Beginners Guide to using `nmap`
Beginners Guide to using nmap
If you've never heard of or used this tool before, then I am mightily jealous of you ! For nmap is one of the most sophisticated , useful and elegant tools a pen tester has in their toolbox. It's a port scanner, which is a scanner for ports. But what are ports ? Ports are a standard amongst operating systems, and they are a plethora of different "shipping dock", which data coming from one client to our computer may choose to deliver their data to. Ports are meant to articulate the destination of a particular kind of traffic, with each protocol being given their own dock. The most common traffic on the internet by far is HTTP traffic and that has its own reserved port : port 80. Often times when we use nmap we'll want to check whether the port is open or closed - receiving traffic or not. This could be doing by typing nmap -p 80 192.168.20.220 if that so happens to your IP.
During a penetration test though we will want to check every port for their state, which albeit is fairly noise as we have to make at least 65,535 requests - one per port. Sometimes the HTTP service will be on a different port and so it's important to be thorough.
Depending on how the port responds to our request (be it a TCP or UDP one), it can be determined as being open, closed, or filtered (usually by a firewall). Once we know which ports are open, we can then look at enumerating which services are running on each port – either manually, or more commonly using nmap.
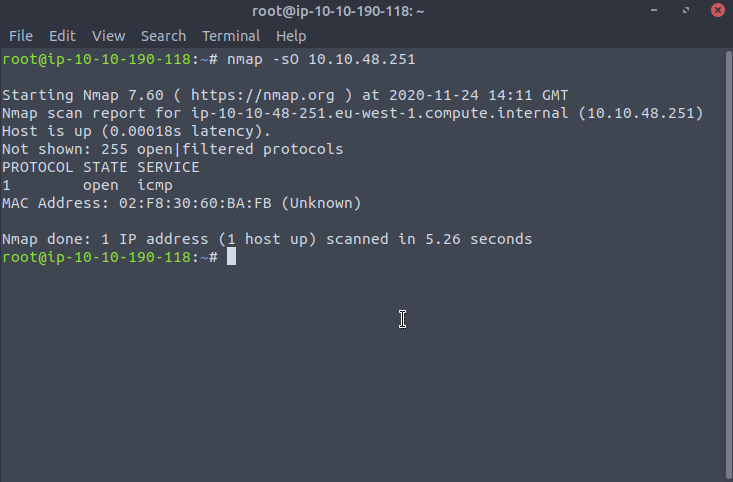
It isn't just about port numbers though, we can also do protocol numbers too, which are all the protocols which stand above the IP layer and help with communications. These protocols go from 0-255 and whilst many beginners won't touch a protocol scan until much later, I think it was quite nice in that ICMP is a protocol which can be checked for , and if this comes back as closed it means the system doesn't use it, and hence any ping scans we wish to run wouldn't work - which is the reason we would then append that -Pn flag to not do any ping scans...

When we do this IP protocol scan, we can't use it in conjunction with our port scans, so open up another terminal window and run the bulk of your scan in a separate window.
Right then ! Onto what you probably wanted to see in the first place :sweat_smile: , which is the port scan. nmap will connect to each port via TCP or UDP, and we can specify ports using the -p option:
nmap 10.10.48.251 -p 21,22,80,443
;; here we would scan for FTP,SSH,HTTP,HTTPS

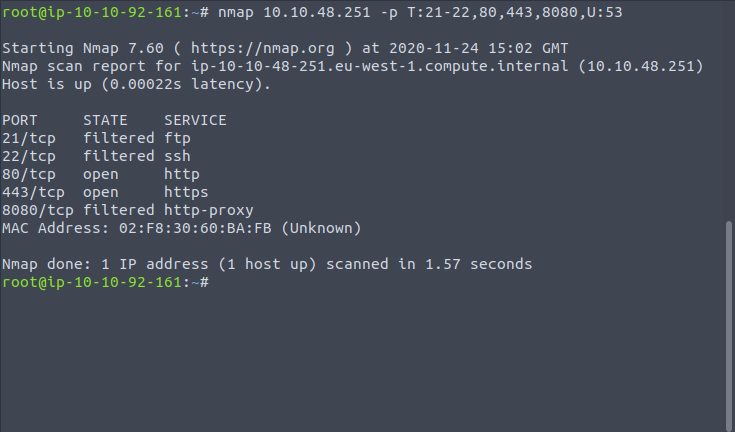
nmap 10.10.48.251 -p T:21-22,80,443,8080,U:53

If you want to specify all ports, beyond the most common 1000 ports, we can do
nmap 10.10.48.251 -p-
;; checks all from 1 - 65,535
Stealth scans, connect scans and more
The best option for us to connect to each port , that uses TCP, is to send a TCP SYN packet, which is fairly innocuous and it will be aptly rejected by the server , but it should get past the first firewall.
nmap 10.10.48.251 -sS
;; scanning of any type follows the form -s<t> where t is the type of scan.
;; UDP isn't as customisable so it's just -sU , whereas with TCP we can choose to send
;; either a SYN packet, an ACK packet or a plethora of other options...
;; this one -sS denotes the SYN scan, or stealth scan.
They are very quick as we aren't setting up a connection. By default, nmap performs a SYN Scan, though it substitutes a connect scan if the user does not have proper privileges to send raw packets (requires root access on Unix), unprivileged users can make use of the connect scan though
nmap 10.10.48.251 -sT
;; this is the connect scan, where we need to send a SYN,ACK,SYN/ACK between each port
;; and us, which is a little slower ...
;; we will definitely get a lot more information though, about the OS ,
;; whether the firewall allows the port, whether the port is filtered etc.
;; The SYN scan we did earlier leaves the connection open, as it doesn't complete
;; a session and it most likely doesn't get logged, though the connect scan invokes a
;; "connect" system call from the OS , and due to the rise in activity the session
;; may be logged.
So we're getting all this information but we don't really see much until the end - and we want to know what nmap is doing ! The standard method of getting the logging up a touch is to use the -v flag for verbose, and if you want slightly more you can do -vv. But it's no good just having , at times, having all this plonked into the terminal as we will want to examine and come back to it later . To save the scan results we can use any of :
-oNto save it in the.nmapextension, this can be used byzenmapif you're doing host discovery scans.-oXto save it into XML format.-oGto save it into a format fit for usinggrep, as it separates the results of each port per host.-oAto save it into all these formats.
Timing
The rate at which we send our packets can be tuned by using the -T parameter with levels from 0-5 or using the word equivalent:
| Timing Level | |
|---|---|
| 0 | paranoid |
| 1 | sneaky |
| 2 | polite |
| 3 | normal |
| 4 | aggressive |
| 5 | insane |
-T3 is the normal option and it will check ports in parallel, it will send out a lot of probes at once and won't really care about evading IDS logging or anything like that. -T0 is as insane as T5 to me, as you will scan each port linearly , and every five minutes you will send a probe to said port...
Don't confuse -T4 with the -A aggressive flag which might sound terrifying is just the single flag which will include the OS , service version identification and traceroute baked in. For timing specifically you have to add one of these to -A if you wish.
Operating System detection
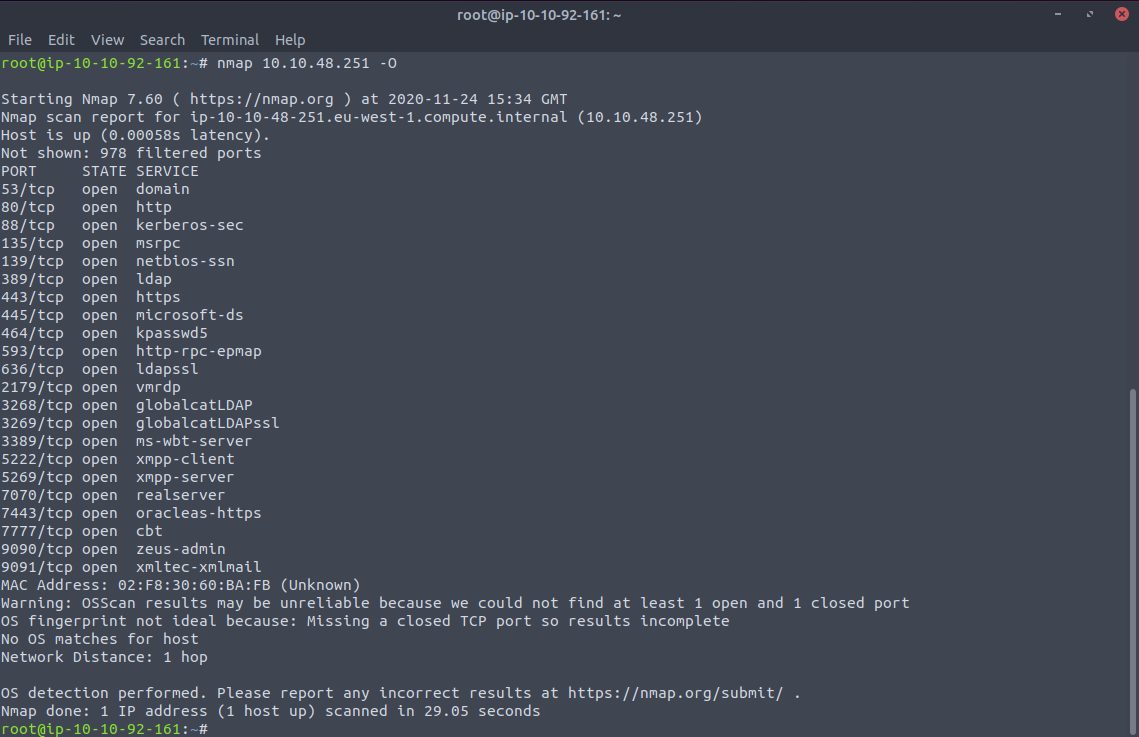
Speaking of operating systems it's time we had a look at the underlying OS which can be deduced in the way it issues TCP packets , what options are enabled and how the system behaves when it has open and closed ports. We can use the nmap -O flag which will first conduct the regular stealth scan (or connect if need be) and then gather all the data into a cohesive fingerprint. If all the ports are open then we don't have a sufficient fingerprint to match it against any of the stored records, as we haven't analysed enough data/behaviour ... This will slow us down but we can also look at the services present to see if they are OS specific:

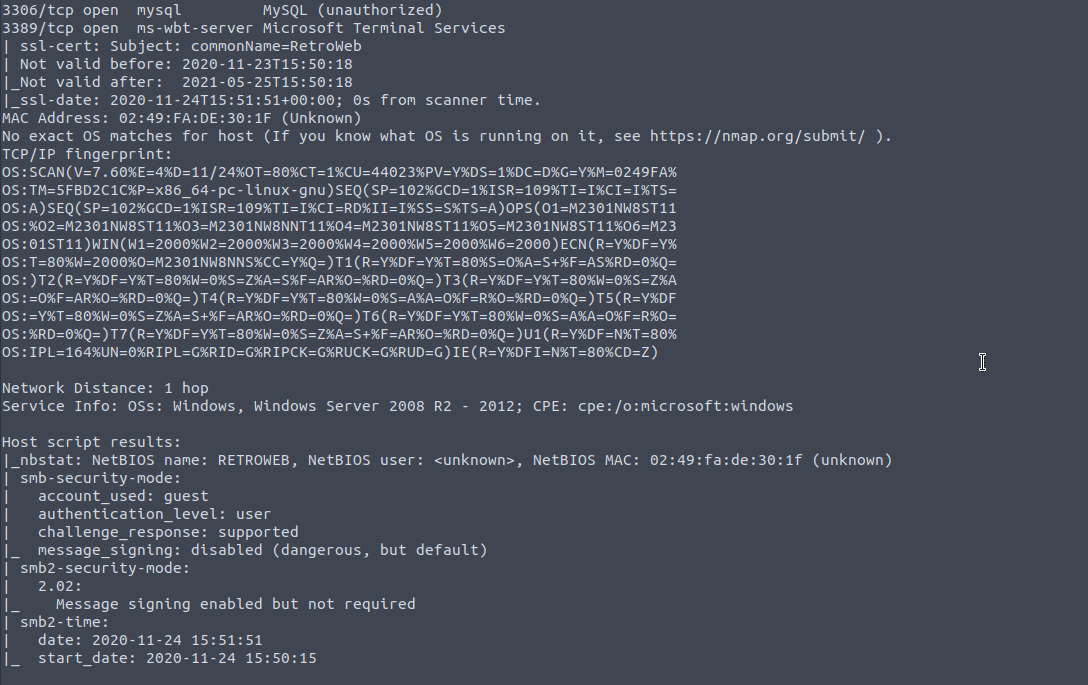
As we can see whilst there are no closed ports, there are a ton of ms- services, but we have no idea whether it is Windows 10, 8, 7 etc... In another box we can see nmap output its best guess from the fingerprint.

Now whilst not exact it comes pretty close, and our knowledge grows yet further. You can add the option --osscan-guess to show all the different options nmap is somewhat confident in.
Operating System version detection resource.
Service Version Detection
Right, we've been doing our regular scans and we can see which ports are open - but we just know they're open because they responded with a TCP/UDP packet, but as for what the service on that port is we have no idea, and we know that port 80 isn't bound to HTTP so running this -sV flag is so important. Once the port has been identified as open we then begin using the probes (queries) kept in the nmap-service-probes database and by the responses we get we can determine whether that port is that service, what version of the service it is, what particular OS would it be bound to etc.
Version detection resource.
The nmap Scripting Engine (NSE)
We can specify a bunch of scripts that come loaded with nmap either by specifying their file path , which can be done by:
locate *.nse
;; though this gives back *every* result, which isn't too helpful
;; see /usr/share/nmap/scripts/ for all defaults.
Or we can specify distinct categories, and do
nmap 10.10.48.251 --script vuln
and this will use all the scripts in the vuln database and check them against the scan results.